Server Setup
HoneyComb LX2
The HoneyComb LX2 is an ARM (Advanced RISC Machine) SBC (Single Board Computer) with 16 cores and support for up to 64GB of memory.
The HoneyComb LX2 is ARM SystemReady ES certified, which means any off the shelf Linux distribution should boot and basic hardware functionality will "just work".

Prerequisites
- 1 @ HoneyComb LX2
- 1 @ Silicon Power 64GB (2 x 32GB) SO-DIMM DDR4 3200MHz (must be a matched pair)
- 1 @ Samsung 2TB 970 EVO Plus NVMe SSD
- 1 @ Linksys USB 3 Gigabit Ethernet Adapter
- 1 @ Cable Matters Micro USB to USB-C cable
- 1 @ SanDisk 32GB Micro SD card
- 1 @ SanDisk 32GB Flash Drive
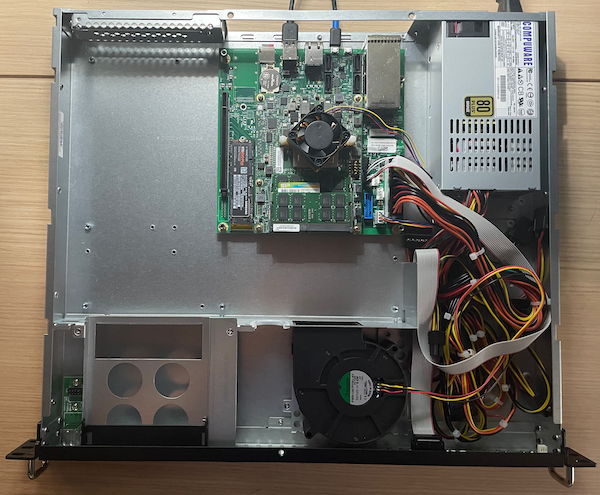
Rackmount
I wanted to rack mount the LX2, so I purchased a 1U Mini-ITX form factor rackmount case from the Mini ITX Store:

I mounted the board and then installed the RAM and the NVMe SSD. I attached the dual 24/20 (sometimes called 20+4) power supply connector to the ATX 24-pin motherboard socket. The fan to the fan PWM socket and the front panel connector ribbon to the board's front panel connectors.
Firmware
I used the balenaEtcher to flash a firmware image (i.e., lx2160acex7_2000_700_3200_8_5_2_sd_ee5c233.img.xz) to the Micro SD card.
Note: You must use the firmware image that matches the clock speed (e.g., 3200 MHz) of your DDR4 RAM.
Operating System
I used the balenaEtcher to flash a Debian 11.5 ISO image (i.e., debian-11.5.0-arm64-netinst.iso) to the USB 3 flash drive.
First boot
Connect the USB 3 ethernet adapter to your switch. Insert the Micro SD card and the USB 3 flash drive.
Serial connection
Use the Micro USB to USB-C cable, connect the micro USB adapter to the LX2 and the USB-C adapter to your workstation (e.g., MacBook Pro).
Look for the device:
ls -l /dev/*usbserial*
You should see something like:
crw-rw-rw-  1 root  wheel  0x9000005 15 Oct 18:06 /dev/cu.usbserial-DK0D18XC
crw-rw-rw-  1 root  wheel  0x9000004 15 Oct 18:06 /dev/tty.usbserial-DK0D18XC
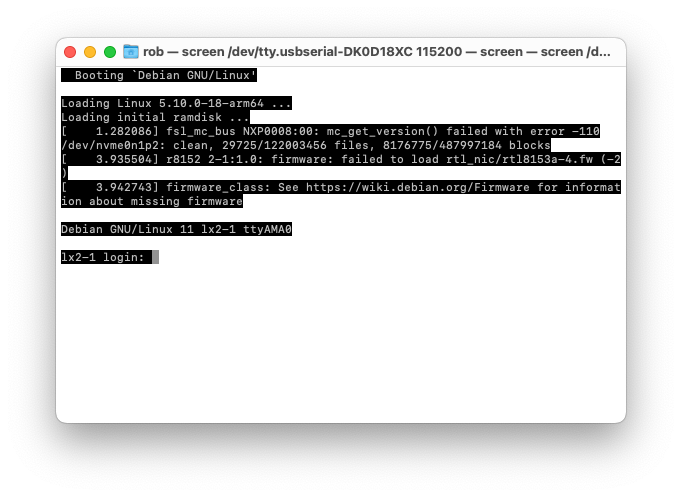
Use screen to open a connection:
screen /dev/tty.usbserial-DK0D18XC 115200
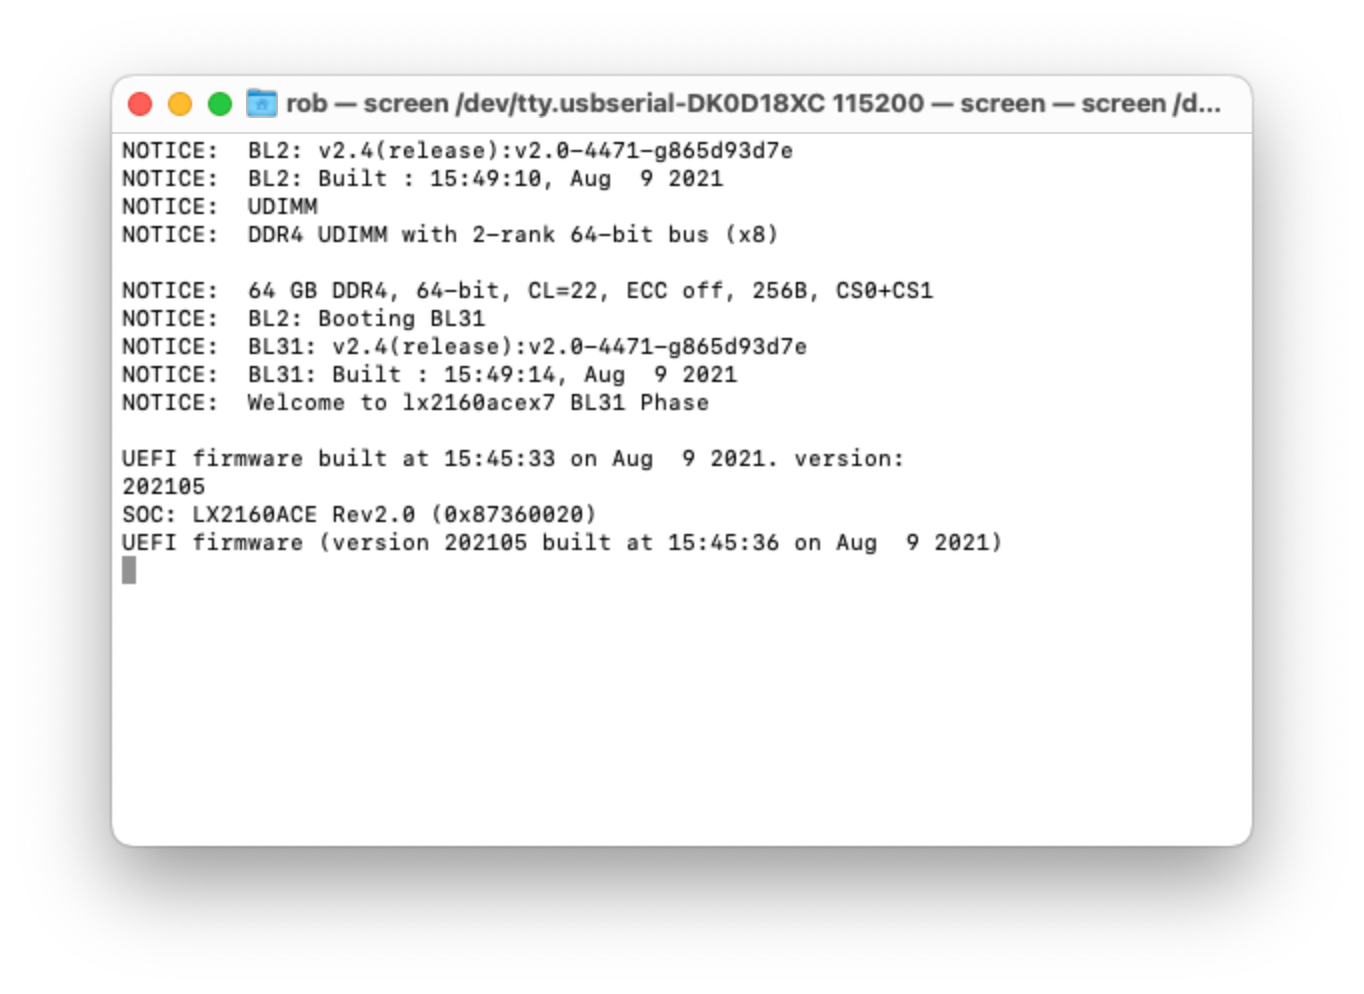
Power on the server.
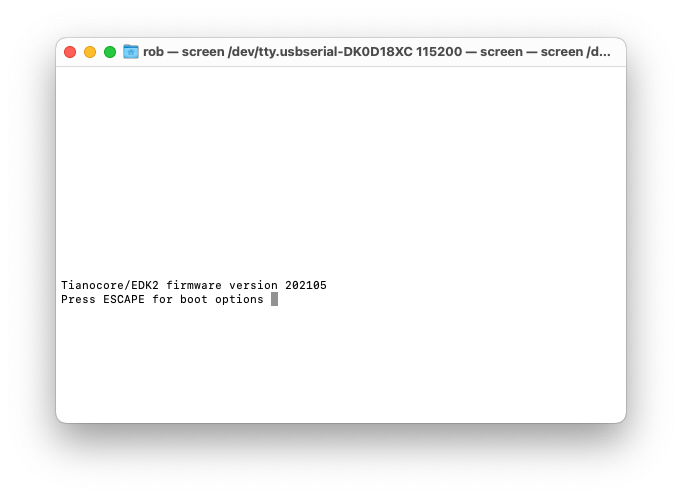
Press the esc key when prompted by the UEFI firmware:
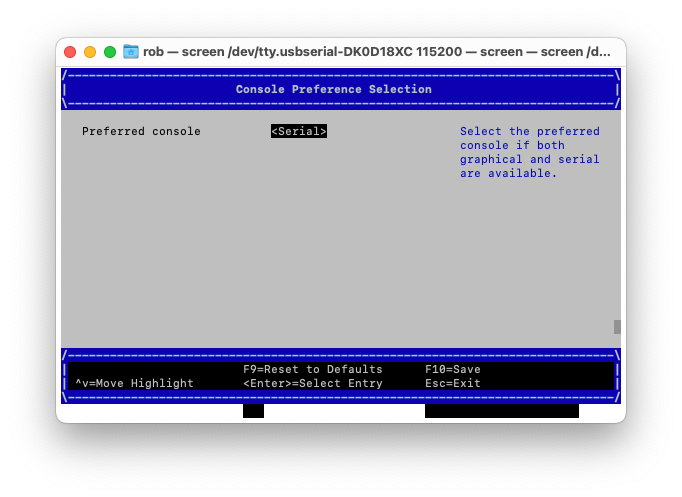
Navigate to the Device Manager -> Console Preference Selection and set the Preferred console to Serial:
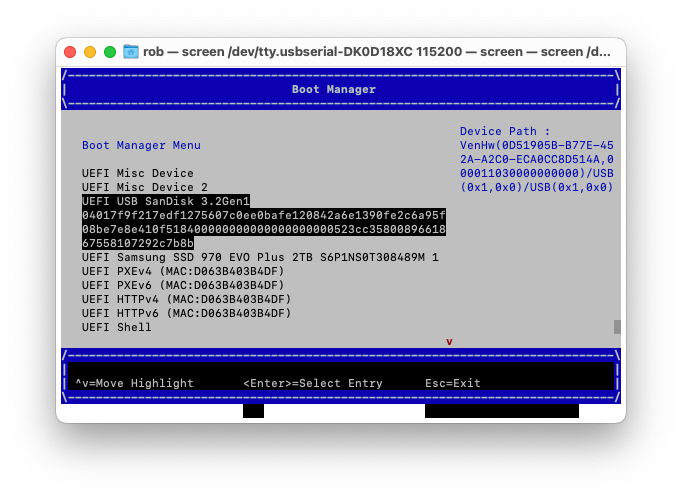
Navigate to the Boot Manager and choose USB SanDisk:
Hit esc to launch GRUB:
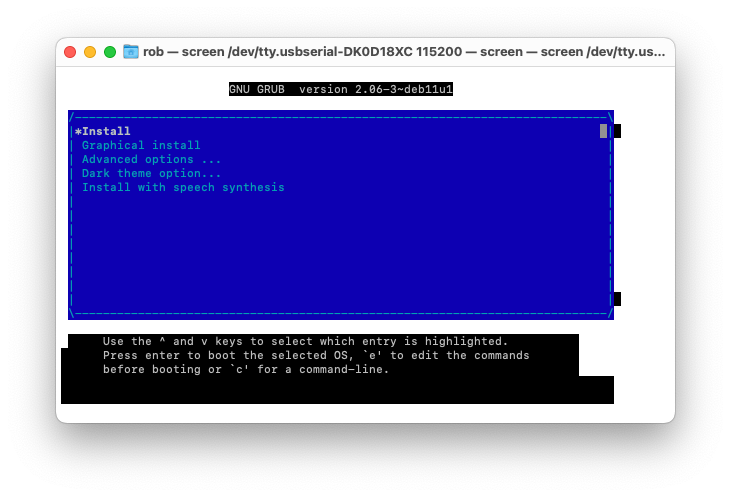
Press e to edit the Install command:
And update it as follows:
arm-smmu.disable_bypass=0 \
iommu.passthrough=1 \
console=ttyAMA0,115200n8 ---
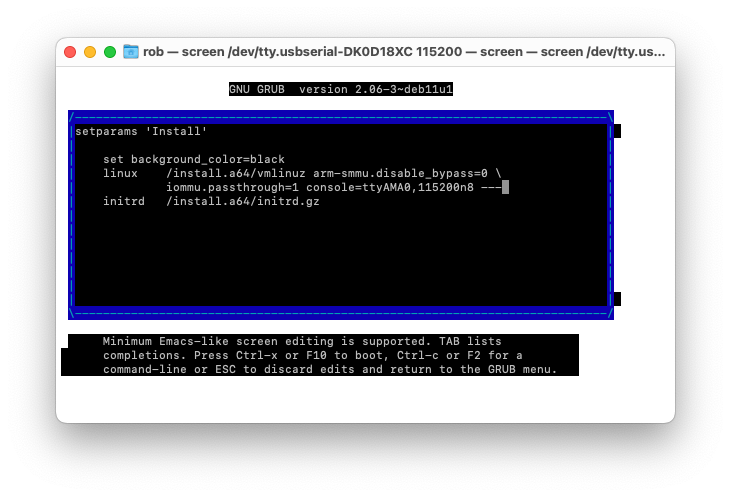
Press Ctrl-x to launch the Debian installer.
The installer will create a 'root' account and prompt you to create an ordinary user account.
The ordinary user account name should be: ada
After the installation is complete power off the server, remove the USB Flash Drive and then power on the server.
Login as root:
Install sudo
su -
apt install sudo
adduser ada sudo
exit
Note: You must log out and log back in for sudo to work.
Update the operating system:
sudo apt update
sudo apt upgrade
sudo apt-get autoremove
sudo apt-get autoclean
Install git
sudo apt install git
Check the version:
git --version
You should see something like:
git version 2.30.2
Add a SSH Public key
Get the public key from your workstation (e.g., MacBook Pro):
cat ~/.ssh/authorized_keys
You should see something like:
ssh-ed25519 AAAAC3NzaC1lZDI1NTF5AAAAIMuwO/L0EadRQwrciM058abNax+7SNt8PdlbwqYtTxSg homer@mbpro-1.home
Create a .ssh directory in the (ada) user’s home directory on the server:
cd /home/ada
mkdir .ssh
cd .ssh
Create an authorized_keys file:
nano authorized_keys
Add the public key to the file:
ssh-ed25519 AAAAC3NzaC1lZDI1NTF5AAAAIMuwO/L0EadRQwrciM058abNax+7SNt8PdlbwqYtTxSg homer@mb-1.home
Then save (Ctrl+O) and exit (Ctrl+X) nano.
Set the file permissions:
chmod 700 /home/ada/.ssh && chmod 600 /home/ada/.ssh/authorized_keys
Set the ownership:
chown -R ada:ada /home/ada/.ssh
Upgrade the Linux kernel
There are some known issues with the ASIX chip drivers (generally used by USB 3 gigabit ethernet adapters) included in off the shelf (mainline) Linux distributions. However, we can address these issues by upgrading the Linux kernel.
The easiest way to upgrade the kernel is to use the backports repository.
Create a sources list for DebianBackports:
sudo nano /etc/apt/sources.list.d/backports.list
And update it as follows:
deb http://deb.debian.org/debian bullseye-backports main
Then save (Ctrl+O) and exit (Ctrl+X) nano.
Download the package index from the backports repository:
sudo apt update
Install the kernel package from the backports repository:
sudo apt install linux-image-arm64/bullseye-backports
Check the version:
uname -s -v
You should see something like:
Linux #1 SMP Debian 5.18.16-1~bpo11+1 (2022-08-12)
The updated kernel has driver support for the LX2's gigabit ethernet adapter.
Configure a static IP
Connect the LX2's gigabit ethernet adapter to a switch using an ethernet (Cat 6) cable.
To configure a static IP we need to edit the /etc/network/interfaces file:
sudo nano /etc/network/interfaces
And update it as follows:
# This file describes the network interfaces available on your system
# and how to activate them. For more information, see interfaces(5).

source /etc/network/interfaces.d/*

# The loopback network interface
auto lo
iface lo inet loopback

# The primary network interface
auto eth0
iface eth0 inet static
  address 192.168.102.13/24
  gateway 192.168.102.1
Reinitialise the network setup:
sudo systemctl restart networking
The server's (lx2-1) address is:
192.168.102.13
Note: You can list interfaces using the following command:
ls /sys/class/net
Configure the hostname
To configure the server's hostname we need to edit the /etc/hostname file:
sudo nano /etc/hostname
And update it as follows:
lx2-1
Then save (Ctrl+O) and exit (Ctrl+X) nano.
We also need to edit the /etc/hosts file:
sudo nano /etc/hosts
And update it as follows:
127.0.0.1       localhost
127.0.1.1       lx2-1.orcada.io lx2-1

# The following lines are desirable for IPv6 capable hosts
::1     localhost ip6-localhost ip6-loopback
ff02::1 ip6-allnodes
ff02::2 ip6-allrouters
Then save (Ctrl+O) and exit (Ctrl+X) nano.
Update grub
To update grub we need to edit the /etc/default/grub file:
sudo nano /etc/default/grub
And update it as follows:
GRUB_CMDLINE_LINUX_DEFAULT="arm-smmu.disable_bypass=0 iommu.passthrough=1 console=ttyAMA0,115200n8"
Then save (Ctrl+O) and exit (Ctrl+X) nano.
Resources
- SolidRun wiki: Serial Connection Guide
- Discord: SolidRun channel
- Debian GNU/Linux Installation Guide: Console configuration
- Debian wiki: sudo
- Debian wiki: Network Configuration